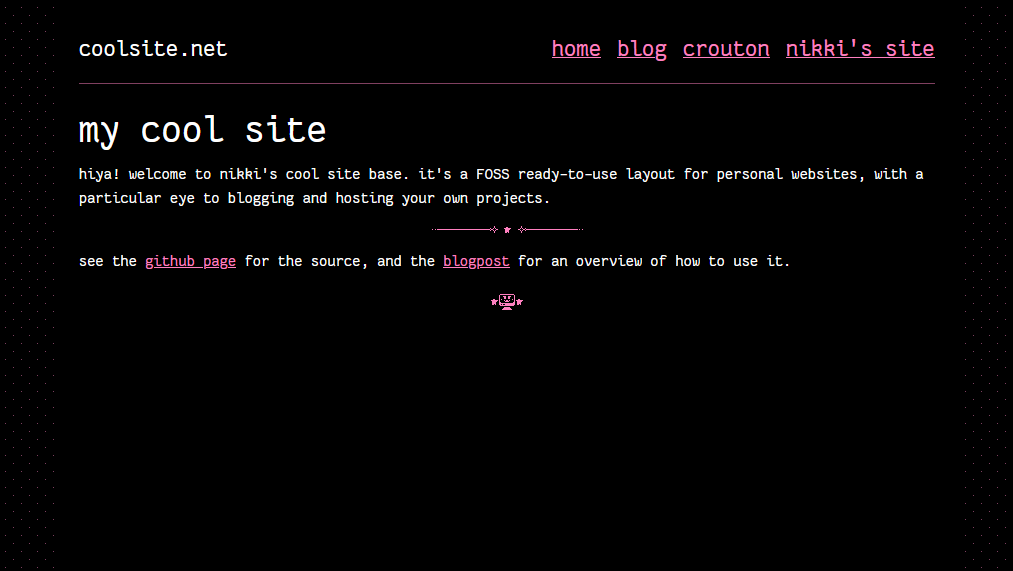
i made a site base you can use
little retro astro layout
(thanks to 🐇 for early feedback on this post!)
my friends showed interest in having a personal website, but also didn't know where to start, so i made a little downloadable site layout so get them up and running more quickly. it comes with some snazzy styling, automatically-updating blog page, and some basic components.
download it:
here's an overview of how to get it set up.
important: learning new things is always overwhelming. the best way to learn is to experiment around with the example pages, change things and see what happens. please take the time to poke around, read and re-read docs, or come back later with a fresh head.
i'll sprinkle doc links around in case you'd like to go deeper into relevant topics. these aren't required reading until you feel like messing with it further. don't be discouraged if things seem too big to grasp at first.
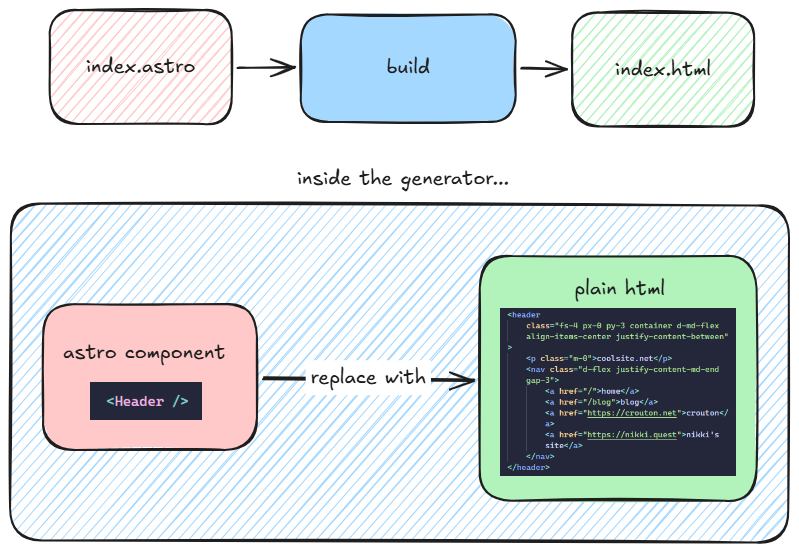
it uses Astro, a static site generator (SSG) to build the site. SSGs are middlemen software that give you tools to develop websites more smoothly, and then output regular HTML at the end.
the main thing i like is the HTML templating, meaning i can easily reuse HTML components across pages instead of copy/pasting everything. when you export the project, Astro combines all relevant code into plain HTML files. (this is how the whole site has a consistent layout, style, and header with links.)
how to use
installing
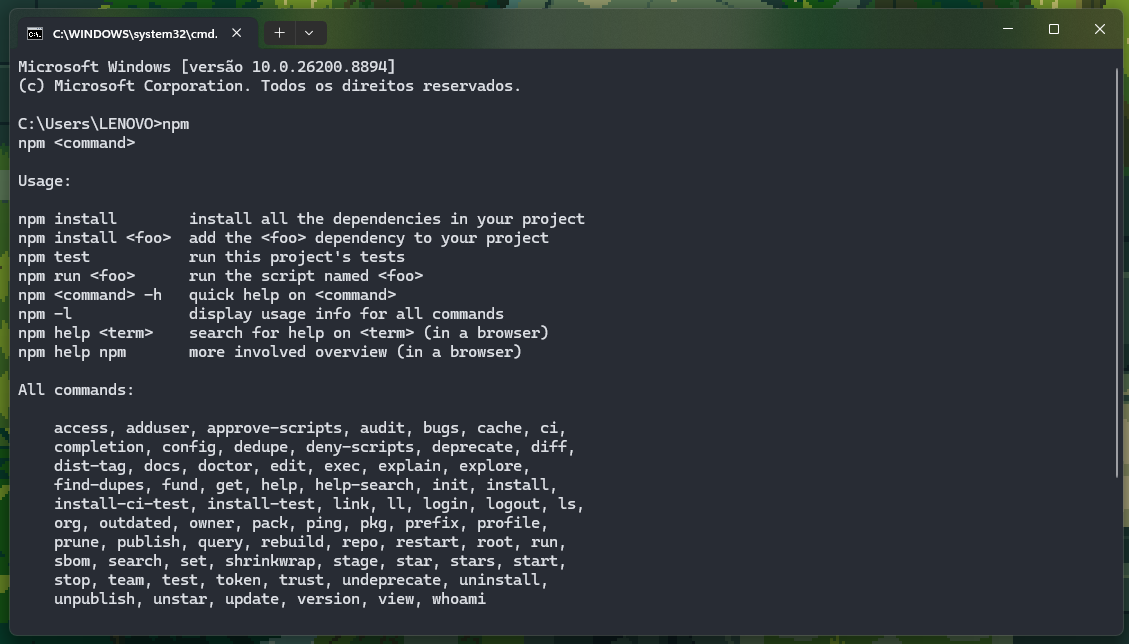
first, get Node.js, a runtime for JavaScript code. we're interested in npm, a command-line interface (CLI) package manager, to install Astro, and the easiest way to get it is to just use the windows installer (.msi).
once installed, we can run it from a terminal. windows ships with the command prompt as a standard text terminal, so open it from the windows menu, and run npm to check if Node's been installed successfully.
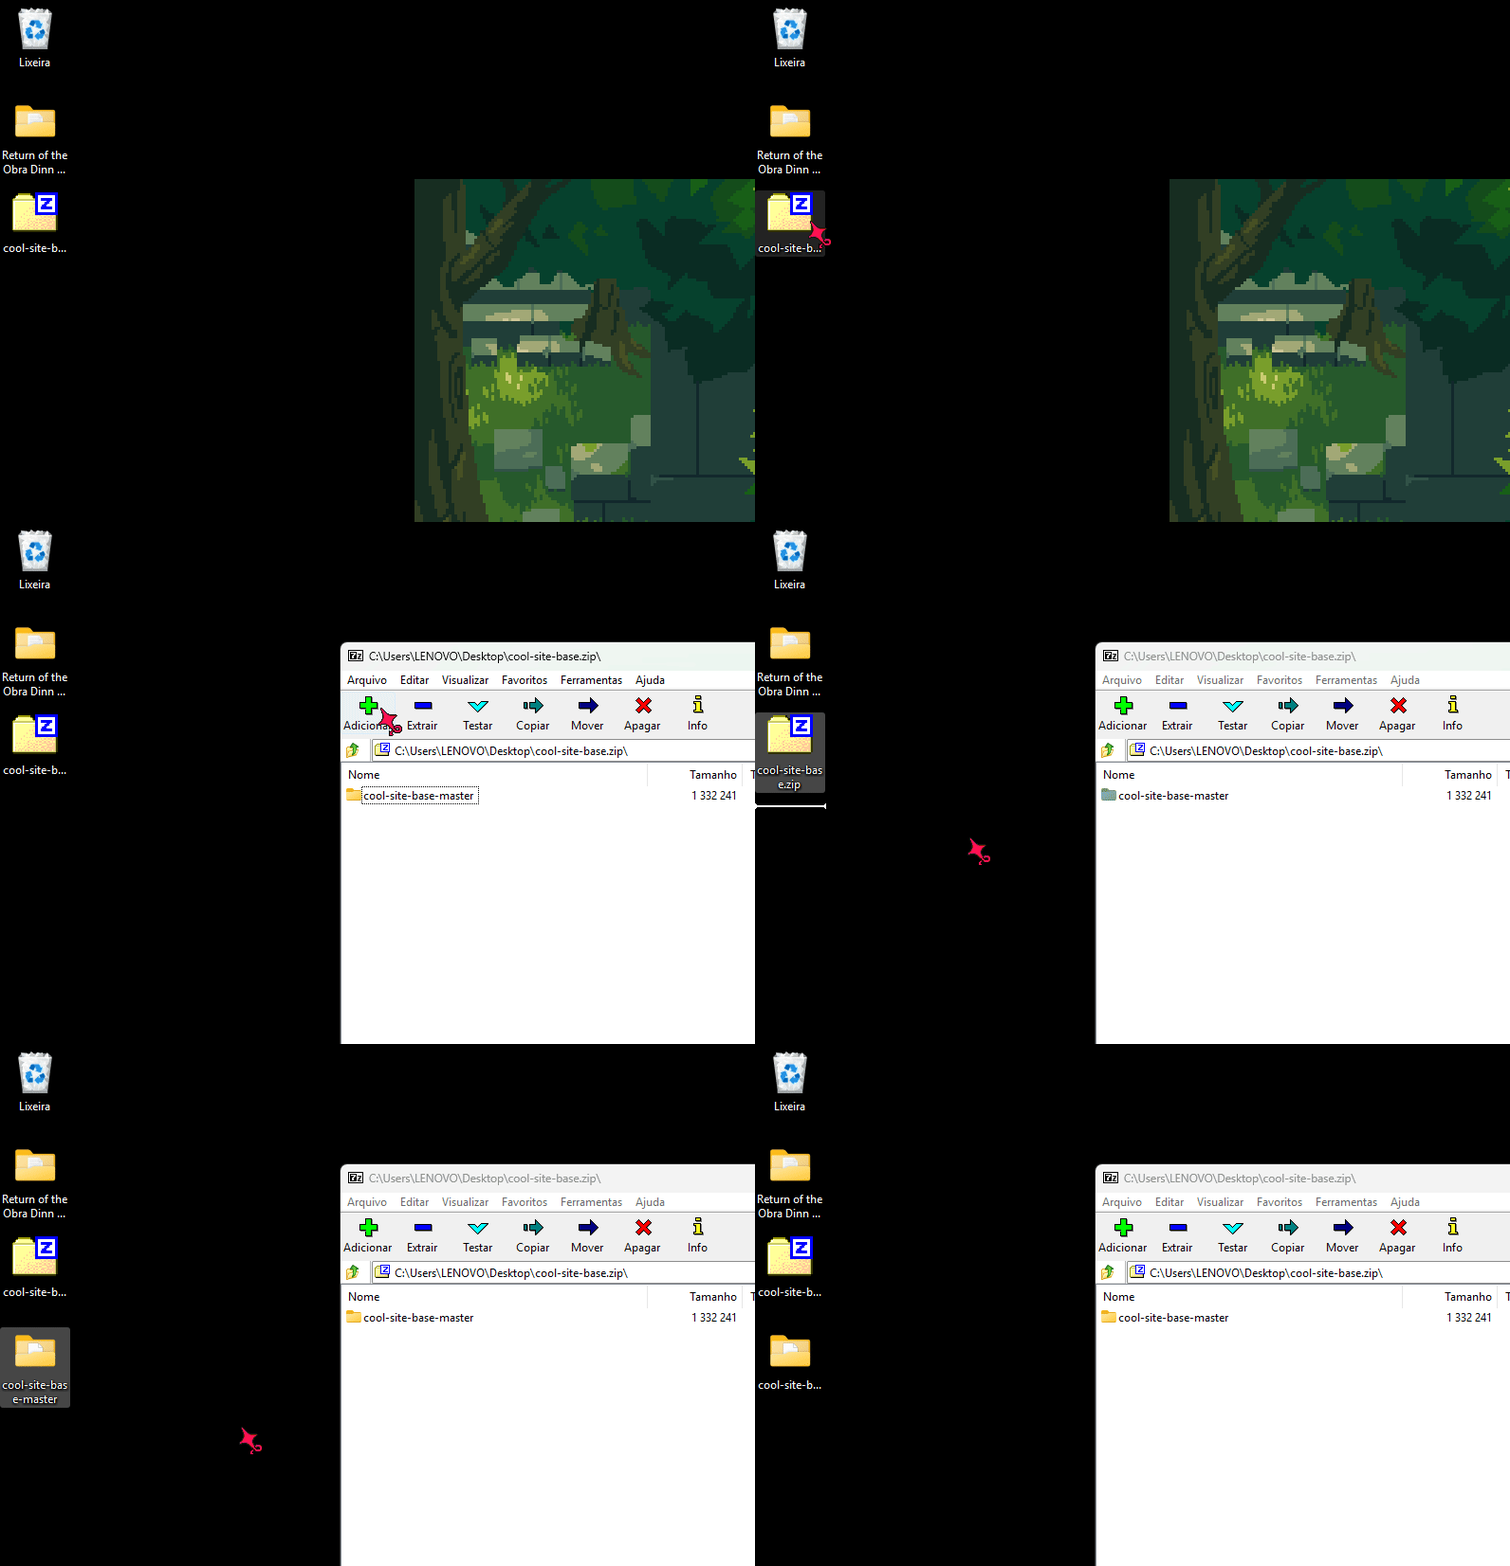
now, having downloaded the site .zip, extract it somewhere with a file archiver like 7zip or WinRAR.
cd directory's path and run npm install to install all the packages the project requires. if it complains about unapproved scripts, run npm approve-scripts with the unallowed script name.
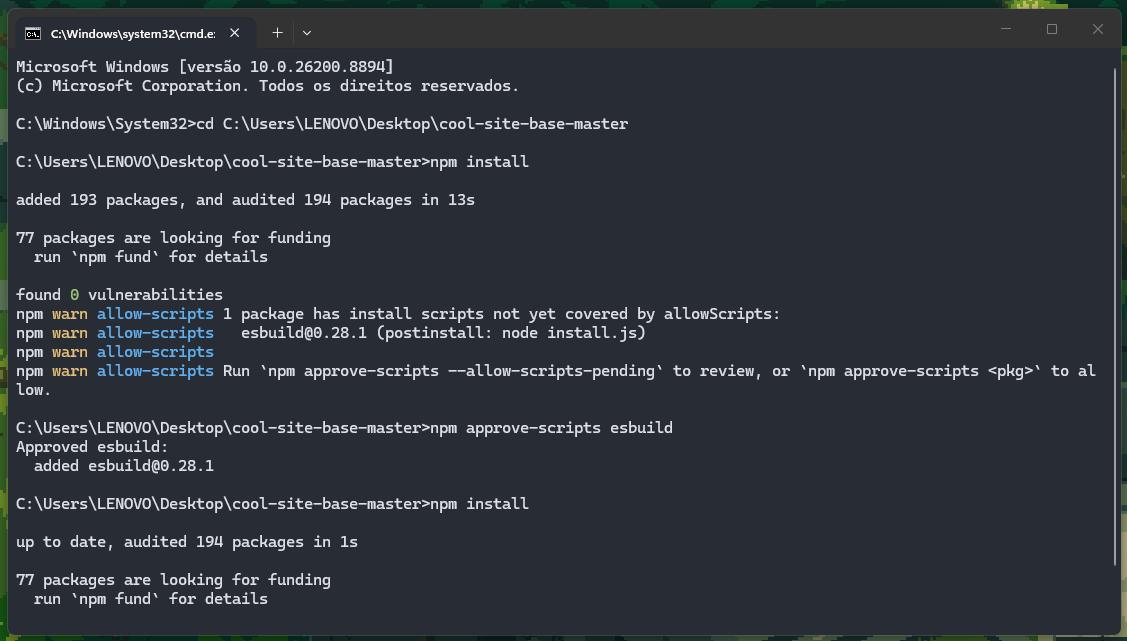
the project is now ready to use.
running
to avoid having to build + export + upload to see changes you've made, you can run your website locally in dev mode. this also automatically updates the site every time you change a file.
in the command line, cd into the project folder as before, and run npm run dev. now a live preview of the site's accessible at localhost:4321 on your browser.
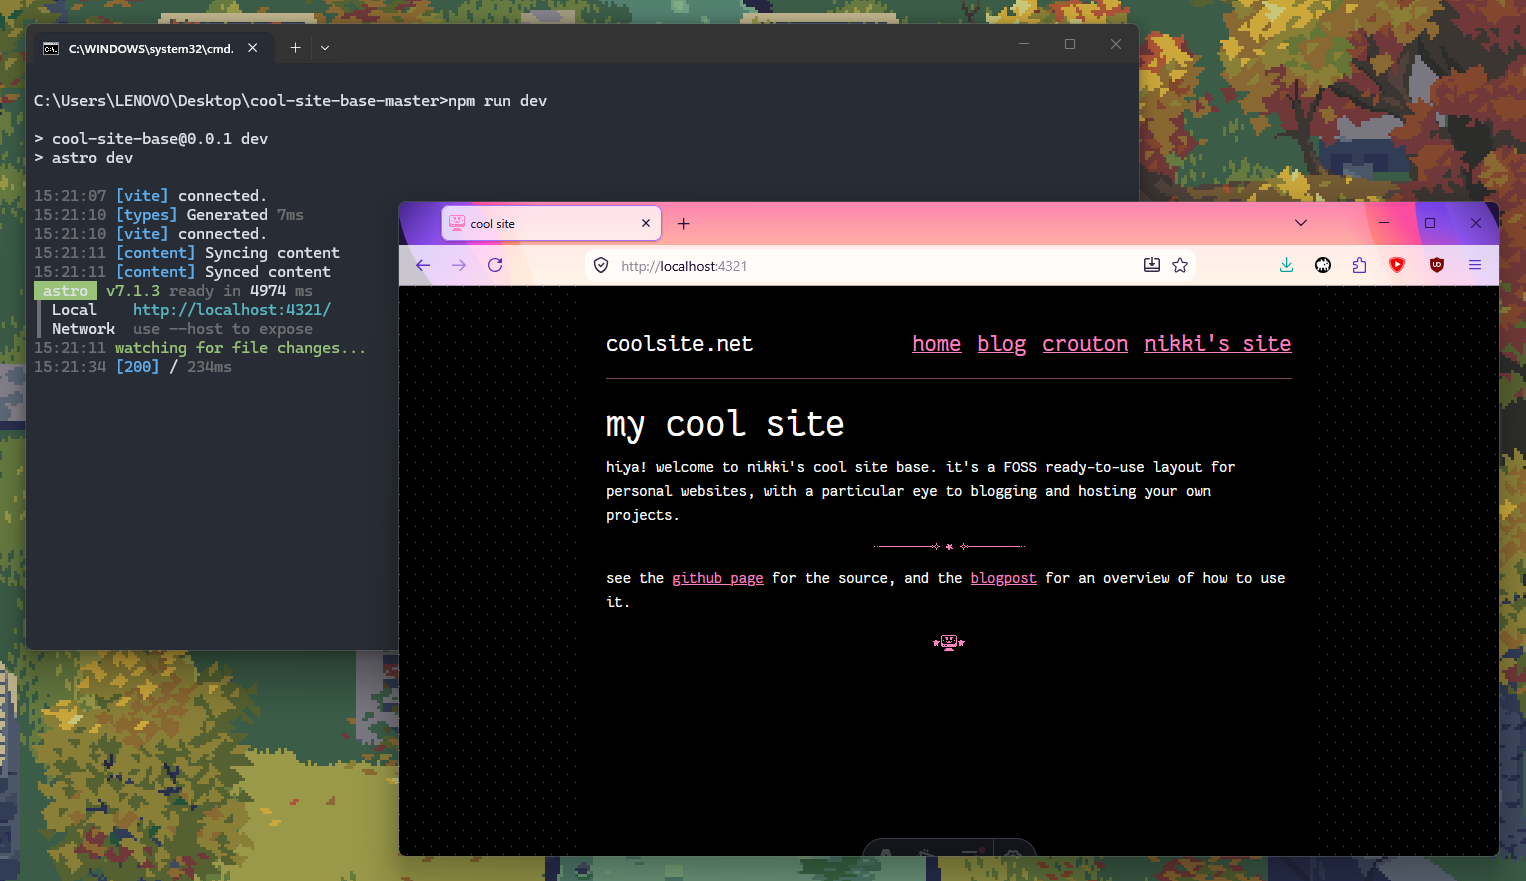
you can now start making changes to it with a text editor. i recommend Notepad++ if you want something simple & straightforward, and VSCode for a fully-featured development environment.
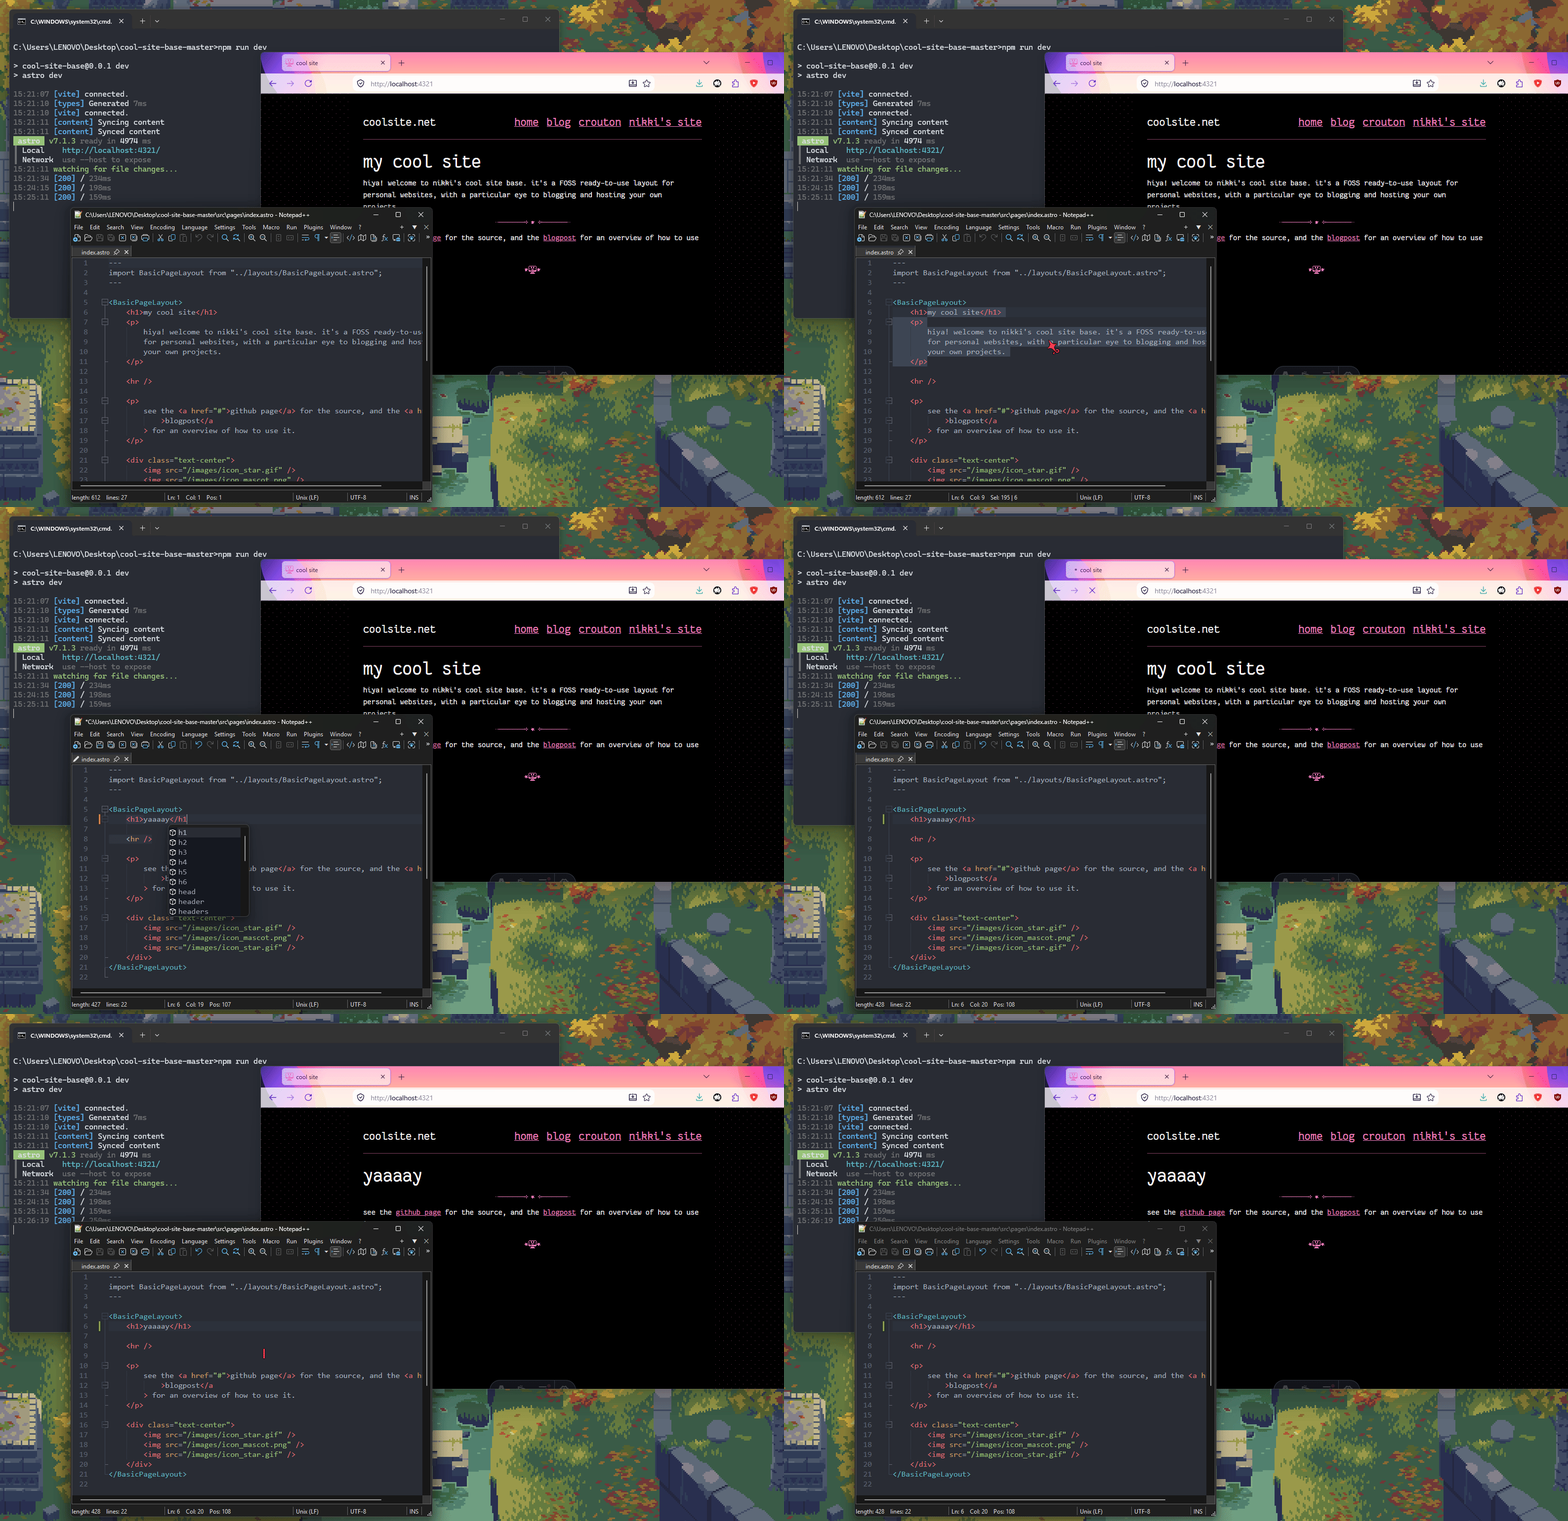
we'll go into hosting a bit later.
adding your own content
the site's folder structure is as follows.
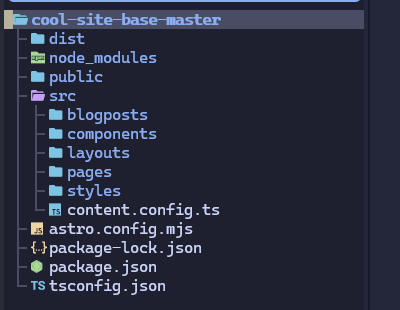
this is mostly the site's framework and supporting code. if you're editing it into your own thing, you'll want to focus on /public and /src.
/public
this is where all public-facing content and media (like images, sounds, any files you distribute) should go. all the contents of the /public folder are accessible to all pages by default, with no leading path. for example, to add /public/images/laptop.png to a page, the path would just be images/laptop.png.
<img src="/images/laptop.png" />this is true for any type of file, for any component, for any page.
/src
this is the source code for the site itself.
/src/pageshas your public-facing pages. you should be able to do with making your own by copy-pastingindex.astroand changing everything inside the<BasicPageLayout>tag./src/blogpostshas.mdfiles that are automatically served inside/src/pages/blog/index.astro, sorted by thepubDatefrontmatter./src/layoutsand/src/componentshave Astro layouts and components, respectively./src/styleshas.cssfiles for styling your page with.main.cssis loaded by default and contains the basic styling for the whole site.
.astro files
.astro files contain Astro templates with special syntax. within the "frontmatter" inside the triple-dashes ---, you can write JavaScript, and then the HTML portion of the file can make use of it with curly braces {}.
---
const name = "Astro";
---

<div>
  <h1>Hello {name}!</h1>  <!-- Outputs <h1>Hello Astro!</h1> -->
</div>
styling
src/styles/main.css is the file used for the site's basic styling. when a CSS file is loaded into a page, it applies styling to the specified HTML elements - for example, a p selector will style everything inside a <p> tag in a certain way.
p {
	color: red;
}
furthermore, you can add a <style> tag to an .astro file to apply styling per-component, meaning, CSS rules will apply only to elements inside the file.
this site makes heavy use of Bootstrap, a collection of premade css stylings, for layouting and smaller styling tweaks. see individual files for more specific explanations of where it's used and why.
hosting
once you're happy with the state of your site, you can render it into plain html by running npm run build in the terminal. this will create a dist folder with your site inside the root project folder. then, you're free to place the contents of that folder anywhere you want to host it.
for example, neocities is a free site host, and a great place for hobbyist websites. to host your site there:
- create an account
- once on the main site, click "edit site" to go to your dashboard
- drag and drop the entire contents of
distonto the dashboard.
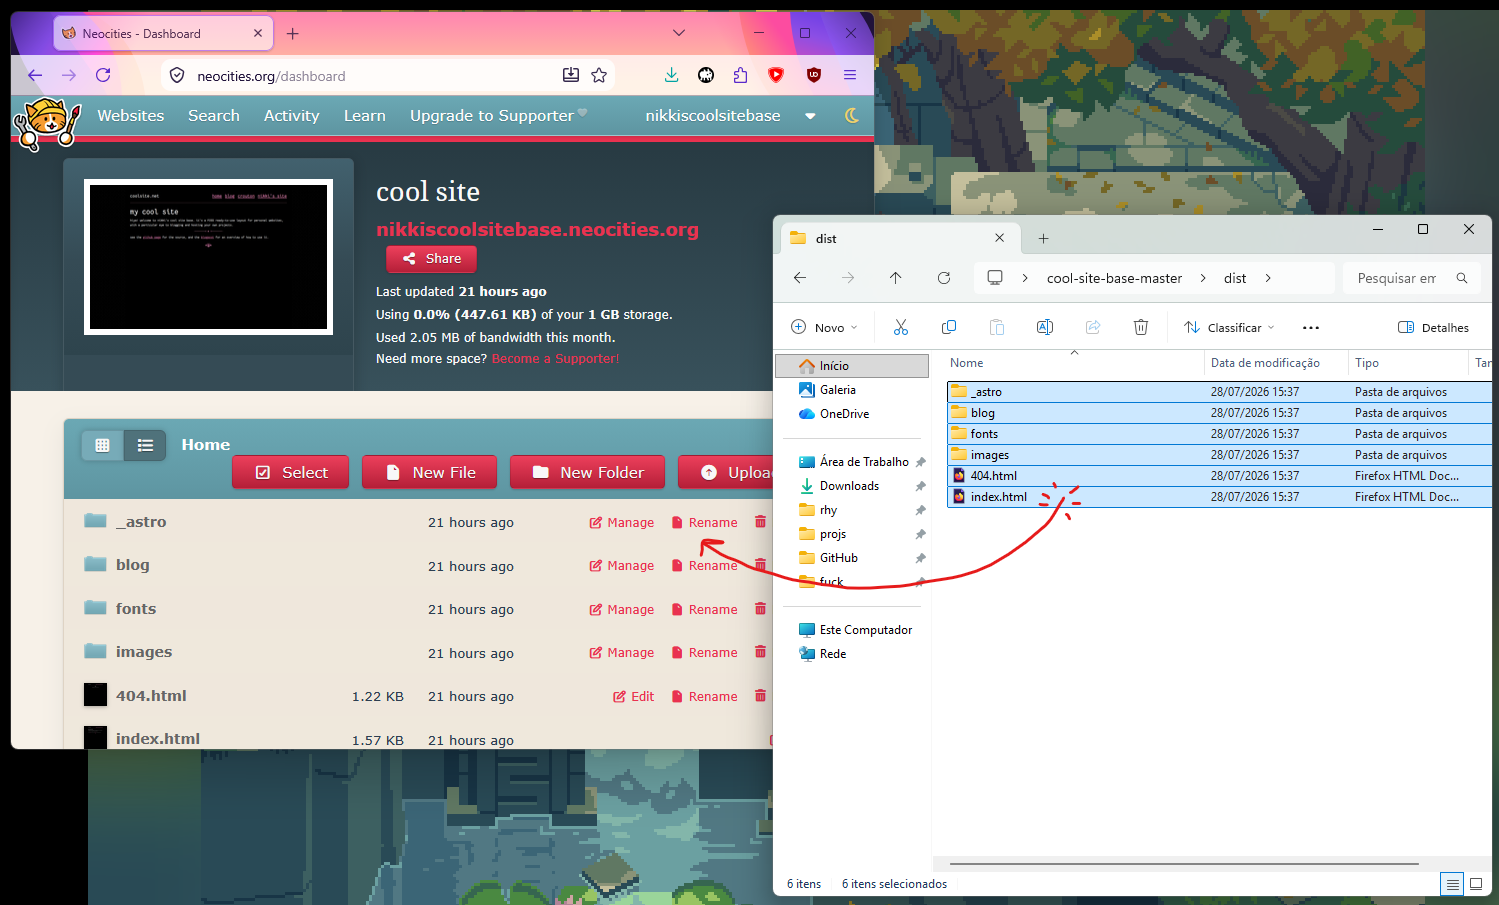
done! your site is now accessible worldwide.
(aside: for a more bespoke and automatic build pipeline, netlify can automatically deploy a site from a GitHub repo of an Astro project. this is how i do my personal site.)
where to next?
this should give you a basic idea of how the site works, hopefully enough that you can start messing around with the innards of the site to style and compose it the way you like.
some further reading:
docs
web design
- sadgrl.online webdev directory
- eggramen CSS testpages
- neocities webdev tutorials
- browse popular neocities websites
i also have a bunch of retro sites i like the look of in my homepage.
good luck :3 i look forward to seeing what you make
